

Introduction to Bitwarden Chrome Extension
What is Bitwarden Chrome Extension?
Imagine having a trusted friend who never forgets a secret, especially when it comes to your myriad of passwords. That’s Bitwarden in a nutshell. This Chrome Extension acts as a digital vault, securely storing your passwords, credit card information, and other sensitive data with top-notch encryption. It’s like having an impenetrable fortress right in your browser, guarding your digital treasures against the relentless pirates of the internet.
Why You Need a Password Manager
In the vast sea of digital information, our personal details are the precious pearls hidden within. Yet, with hackers continually on the prowl, how do we keep our pearls safe? A password manager is not just a luxury; it’s a necessity. It’s the treasure map that leads you to peace of mind, knowing your online identity is secured behind layers of encryption.
Related Content: BTRoblox Extension
How to Install Bitwarden Chrome Extension
Getting Bitwarden up and running is as easy as pie. A few clicks in the Chrome Web Store, and voila, you’re one step closer to securing your digital life. This section will guide you through each step, ensuring you’re set up for success.
Step-by-Step Installation Guide
- Open Chrome: Fire up your Chrome browser with a smile on your face. It’s about to get a whole lot easier to manage your passwords!
- Visit the Chrome Web Store: Take a little stroll to the Chrome Web Store. You can find it by typing “chrome web store” into your address bar or by searching for it in your search engine. It’s like the candy store for browser extensions!
- Search for Bitwarden: Once you’re in the Chrome Web Store, type “Bitwarden” into the search bar. Hit Enter and watch as the magic unfolds.
- Click on Bitwarden: Look for the Bitwarden extension among the search results. It’s usually the one with the slick logo and the reassuring green checkmark.
- Click “Add to Chrome”: Take a deep breath and click that inviting blue button that says “Add to Chrome.” You’re about to make your online life a whole lot simpler!
- Confirm Installation: Chrome might ask you for confirmation to add the extension. Just nod along and give it the green light. Trust me, Bitwarden is your new best friend in the world of online security.
- Login or Sign Up: If you already have a Bitwarden account, go ahead and log in. If not, don’t worry! You can sign up right then and there. It’s quick, easy, and totally worth it.
- Set Up Bitwarden: Follow the prompts to set up Bitwarden just the way you like it. You can import passwords, generate new ones, and organize everything to your heart’s content.
- Start Using Bitwarden: With Bitwarden installed, you’re ready to rock and roll! Enjoy the peace of mind that comes with having a secure vault for all your passwords and sensitive information.
- Give Yourself a Pat on the Back: Congratulations! You’ve successfully installed the Bitwarden Chrome extension. Now go ahead, pat yourself on the back, and bask in the glow of your newfound online security prowess. You’re a digital superhero! 🦸♂️🔒
Bitwarden Download
Bitwarden Chrome Extension: Chrome
Bitwarden Firefox Extension: Firefox
Bitwarden Edge Extension: Edge
Bitwarden Safari Extension: Safari
Bitwarden Desktop: Windows
Setting Up Your Bitwarden Account
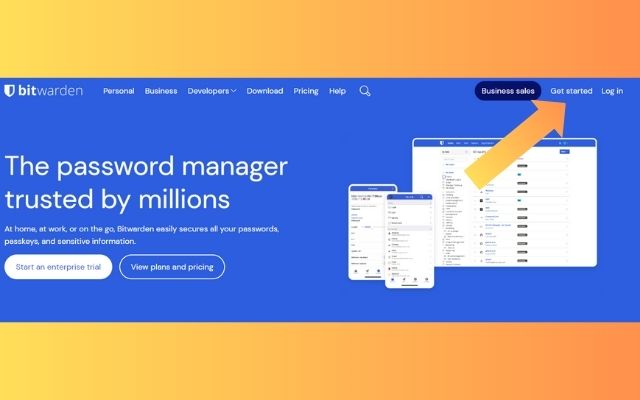
- First of all, let’s go through the link we gave to the Bitwarden site. Go to Site.
- Let’s create an account from the place I marked in the picture.
- Fill in the required fields on the page that opens. Just press the “create account” button.
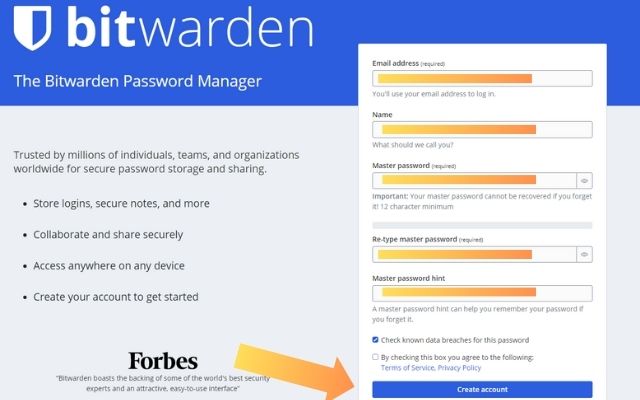
- Confirm the confirmation e-mail sent to your e-mail.
- Bitwarden login.
Key Features of Bitwarden Chrome Extension
Secure Password Storage
Bitwarden Chrome Extension excels in providing secure password storage through robust encryption standards. The AES-256 bit encryption ensures that your passwords and sensitive data are protected from unauthorized access. The extension acts as a digital fortress, safeguarding your information against potential cyber threats.
Auto-Fill and Auto-Save Functionality
One of the standout features of Bitwarden is its seamless integration with your web browser, offering convenient auto-fill and auto-save functionality. When you navigate to a website requiring login credentials, Bitwarden steps in to automatically fill in your username and password. This not only saves time but also reduces the risk associated with manual entry.
Generating Strong Passwords
Bitwarden goes beyond basic password management by offering a powerful password generation tool. It assists users in creating strong, complex passwords that enhance the overall security of their online accounts. The generated passwords follow best practices, making it significantly harder for malicious entities to compromise your accounts.
Related Content: RoPro Extension
Maximizing Online Security with Bitwarden
Best Practices for Password Management
Bitwarden not only provides a secure environment for password storage but also encourages best practices for effective password management. Consider the following tips to maximize your online security:
- Diversify Your Passwords: Use unique passwords for each online account to prevent a domino effect in case one password is compromised.
- Regularly Update Passwords: Set a routine to update your passwords at regular intervals. This reduces the risk associated with prolonged use of the same credentials.
- Utilize the Password Generator: Take advantage of Bitwarden’s password generation feature to create strong, complex passwords that are difficult for attackers to decipher.
- Review and Audit: Periodically review the stored passwords in Bitwarden. Remove any unused or outdated entries to maintain a lean and secure password vault.
Using Bitwarden for Two-Factor Authentication
Enhance your online security further by incorporating Bitwarden for Two-Factor Authentication (2FA). Bitwarden supports various 2FA methods, adding an extra layer of protection to your accounts. Here’s how you can use Bitwarden effectively for 2FA:
- Enable 2FA for Bitwarden Itself: Begin by enabling 2FA for your Bitwarden account. This adds an additional barrier, protecting your master password with a second authentication method.
- Sync 2FA Codes: Bitwarden can securely store and sync 2FA codes for your accounts. This streamlines the 2FA process, allowing you to access codes directly from the Bitwarden app when needed.
- Audit 2FA Settings: Regularly review and update your 2FA settings within Bitwarden. Ensure that all connected accounts are configured for optimal security.
Comparing Bitwarden to Other Password Managers
Bitwarden vs. LastPass
Security and Encryption
Both Bitwarden and LastPass prioritize security, utilizing strong encryption standards. However, Bitwarden stands out with its open-source nature, allowing users to inspect the code for transparency. LastPass, while secure, relies on a closed-source model.
Cross-Platform Functionality
Bitwarden and LastPass offer cross-platform functionality, allowing users to access their passwords on various devices. Bitwarden’s open-source approach makes it adaptable to different platforms, while LastPass provides a user-friendly experience across devices.
Pricing
Comparing pricing plans is crucial. Bitwarden offers a free version with essential features and a premium plan at a competitive price point. LastPass, on the other hand, has a free version and a premium plan with additional features at a higher cost.
| Features | Bitwarden | LastPass |
|---|---|---|
| Security and Encryption | – Being open-source contributes to code transparency. – Uses AES-256 bit encryption. |
– Employs strong encryption standards. – Code is closed-source. |
| Cross-Platform Functionality | – Adaptable for usage on different platforms. | – Offers a seamless experience on various devices. |
| Pricing | – Offers a free basic version and a competitively priced premium plan. | – Provides a free basic version and a higher-priced premium plan with additional features. |
| User Interface and Experience | – Minimalistic design with a simple user interface. | – Features a more polished and feature-rich user interface. |
| Password Sharing and Emergency Access | – Secure password sharing is available. | – Excels in emergency access, allowing trusted individuals to access your account. |
| App Development and Updates | – Open-source model allows for continuous updates. | – Updates are generally more consistent as they are under their own control. |
Bitwarden vs. Dashlane
User Interface and Experience
Bitwarden and Dashlane provide user-friendly interfaces. Bitwarden follows a minimalistic design, prioritizing simplicity, while Dashlane offers a more feature-rich and polished interface.
Password Sharing and Emergency Access
Bitwarden allows secure password sharing, making it suitable for families or team use. Dashlane excels in emergency access features, allowing trusted contacts to access your account in critical situations.
Cost and Premium Features
Bitwarden’s pricing is transparent, with a cost-effective premium plan. Dashlane, while offering a free version, has a higher price point for its premium features. Users should consider the specific features they need when evaluating costs.
Related Content: Betternet VPN Download
Advanced Features and Tips
Organizing Passwords with Folders and Collections
Efficiently managing your passwords involves more than just storing them securely; it’s about organizing them effectively. Bitwarden provides advanced features to streamline this process.
Folders:
Bitwarden allows you to create folders to categorize and group your passwords. For example, you can have folders for work-related, personal, or financial accounts. This not only helps in keeping your passwords structured but also makes it easier to locate specific credentials.
Collections:
Collections in Bitwarden are a step beyond folders. They enable you to group related items together, including passwords, secure notes, and other sensitive data. This granularity allows for a more detailed and customized organizational structure.
Sharing Securely with Bitwarden
Bitwarden’s secure sharing features make collaboration and password management within groups effortless.
Share Individual Items:
You can securely share individual passwords or other items with specific Bitwarden users. This is particularly useful for sharing credentials within a team without compromising security.
Shared Folders:
Bitwarden allows the creation of shared folders, simplifying the process of sharing multiple items with a group. Any updates or additions to the shared folder are automatically reflected for all members, ensuring everyone has access to the latest information.
Emergency Access:
Bitwarden provides an Emergency Access feature, allowing you to designate trusted individuals who can request access to your vault in case of an emergency. This ensures continuity in accessing critical accounts even if you’re unavailable.
These advanced features not only enhance your password management capabilities but also contribute to a more collaborative and secure digital environment.
Conclusion and Final Thoughts
Why Bitwarden is the Right Choice for You
As we wrap up our exploration of Bitwarden, it becomes evident why it stands out in the realm of password managers. Several factors make Bitwarden the right choice for many users:
Open-Source Transparency:
Bitwarden’s open-source nature ensures transparency and allows users to verify the security of the platform. The ability to inspect the code adds an extra layer of trust, especially in an era where online security is paramount.
Cross-Platform Flexibility:
Whether you’re using a desktop, laptop, smartphone, or tablet, Bitwarden seamlessly integrates across various platforms. This flexibility ensures that your secure information is accessible whenever and wherever you need it.
Affordable Premium Features:
Bitwarden offers a cost-effective premium plan with advanced features. The pricing structure makes it accessible to a broad audience without compromising on security or functionality.
Robust Security Measures:
With AES-256 bit encryption, Bitwarden prioritizes the security of your sensitive data. The commitment to using industry-standard security protocols enhances the overall protection of your passwords and other confidential information.
Getting Started with Bitwarden Today
Now that you’ve learned about the features and advantages of Bitwarden, getting started is a straightforward process:
- Sign Up: Create a Bitwarden account by visiting their official website.
- Download the App: Install the Bitwarden app on your preferred devices, whether it’s your computer, smartphone, or tablet.
- Set Up Your Vault: Begin by adding your passwords and other sensitive information to your Bitwarden vault.
- Explore Advanced Features: Take advantage of Bitwarden’s advanced features, such as organizing passwords with folders, secure sharing, and utilizing two-factor authentication.
By embracing Bitwarden, you’re not just adopting a password manager; you’re enhancing your digital security and simplifying your online experience.
FAQ
Is there a Chrome extension for Bitwarden?
Yes, Bitwarden has a dedicated Chrome extension. You can easily add it to your Chrome browser from the Chrome Web Store. Once added, it seamlessly integrates with your browser, providing secure password management directly within Chrome.
How safe is the Bitwarden extension for Chrome?
Bitwarden takes security seriously. The extension uses AES-256 bit encryption, an industry-standard encryption protocol, to ensure the safety of your stored passwords and sensitive data. Additionally, Bitwarden's open-source nature allows users to inspect the code for transparency and security assurance.
How do I enable Bitwarden Auto-fill in Chrome?
To enable Bitwarden Auto-fill in Chrome:
- Install the Bitwarden extension from the Chrome Web Store.
- Log in to your Bitwarden account within the extension.
- Navigate to the website for which you want to enable Auto-fill.
- Bitwarden will prompt you to save the login information. Confirm and save.
- For subsequent visits to the site, Bitwarden will automatically fill in the login details.
How do I enable Bitwarden in Chrome incognito?
To enable Bitwarden in Chrome incognito:
- Open the Chrome browser.
- Click on the Bitwarden extension icon.
- In the Bitwarden extension menu, click on “Settings.”
- Scroll down to the “Options” section.
- Enable the option that says “Allow in incognito.”
Now, Bitwarden will be active and available for use in Chrome’s incognito mode.
Bitwarden Chrome Extension Not Showing
- Check Extension Icon: Ensure that the Bitwarden extension icon is present in your Chrome toolbar. If not, you may need to pin it. Right-click on the extensions area, select “Pin,” and Bitwarden should appear.
- Extension Enabled: Confirm that the Bitwarden extension is enabled. Open the Chrome menu, go to “More tools,” then “Extensions.” Make sure the Bitwarden extension is enabled.
- Browser Update: Ensure your Chrome browser is up to date. Outdated browsers may not properly support extensions.
- Reinstall the Extension: Try uninstalling and reinstalling the Bitwarden extension. Go to the Chrome Web Store, find Bitwarden, and click “Remove from Chrome.” Then, re-install it.
- Clear Browser Cache: Clear your browser cache and cookies. Sometimes, cached data can cause extension display issues.
- Conflict with Other Extensions: Disable other extensions one by one to check if there’s a conflict. Some extensions may interfere with Bitwarden’s display.
- Incognito Mode: Check if the extension is visible in Chrome’s incognito mode. If it appears there but not in the regular mode, there might be an issue with your Chrome profile.
- Browser Settings: Ensure that browser settings or policies are not preventing the display of extensions.
- Operating System: Check if your operating system is causing any compatibility issues. Ensure your OS and Chrome are both updated.
If the problem persists after trying these steps, you may want to contact Bitwarden support for further assistance or check their community forums for additional insights.


